Translate This Page
The Citroen H van up to 1963 usually had a 6 volt electrical system with Dynamo. Although the electrical demand on the dynamo is light (because of the absence of Air Conditioning, Electric seats and Electric Powered steering which you may have noticed?) the primary weakness is in the poor light output of 6v bulbs, particularly headlights.
The cost of 6v bulbs is also much higher than the 12v equivalent.
If you have a 6 volt system and Starting is difficultt, make sure the Ignition system is in top condition, new points, plugs, distributor, rotor arm etc, it is these that make a huge difference to the starting on an old car/van. The points should be checked, cleaned and reset EVERY 3,000km when an Oil change is also essential.
Battery condition and quality is absolutely crucial (don't use a budget battery, see Technical Page for battery advice/supplier)
If you fail to service the points every 3,000km fuel consumption will increase and starting will become difficult. This in turn will strain the starter Motor which will burn out leaving you with a £190 bill + labour.
A 6volt system Starts and runs just as well as 12v if all parts are in good serviced condition.
Converting to 12v in isolation will not make a big difference to the starting of a van if the above are not in good condition.
To convert from 6v to 12v you need :
New side light, Indicator and Headlight bulbs. The 6v headlight bulbs are a unique format. No 12v bulbs will fit in the 6v Headlight Glass lens. To use 12v bulbs you need new lenses with modern bulb holders. You will find H4 capable lenses for sale but these are for Continental 'Drive On the Right' only as they dip to the right and will fail a UK MOT. The best, Citroen Original, Glass Lens/refectors have a rotating base that can be rotated left or right for both UK and Continental driving.
Some of the later lenses do not sit tight in the old Headlight shells, we suffered an MOT failure as a result on one van, so check your new lenses are compatible with the old Headlight shell. New Headlight shells are not expensive at about £50 a pair.
New 12v generator of some form. The Early vans had a 6v Dynamo which had poor output, struggled to charge the battery when the Headlights were on. Around 1962 the van moved over to 12v with a 12v Dynamo. The 12v Dynamo was soon replaced by a 12v Alternator, although it's output is not high. If you want to retain the look of the orginal 6v then fit a later 12v Dynamo. But we think the most usable option is a modern 70a high output Alternator.
We can supply a modern Alternator with a 15mm pulley ( or 12v Dynamo if you want to keep it original) plus brackets. Note that the 12v Alternators from later vans have a 10mm Pulley which needs to be replaced with a wide belt version if used on pre 1962 vans.
New Starter Motor (not strictly essential, see later note)
New Ignition Coil (not strictly essential, see later note) However, a Coil has a finite life and a 6v one is likely to be well beyond it's one. At £20 for a quality Lucas Sports Coil it is good insurance against misfires, poor running, etc.
New 12v instrument gauges (not strictly essential, see later note)
New flasher relay. 6 volt vans usually had Traficators which did not flash.
Wiper Motor (or use one of our 12v to 6V light duty Voltage droppers at £9)
The 6v vans tend to have a wiring loom with cotton wrapped insulation which at 60 years is often past its best. Franzose can supply a new wiring Loom. We suggest if you go from 6v to 12v and want reliable Electrics you consider one.
BULBS
Switch to lower power, high brightness LEDs because the wiring/connections in a 50 year van are usually beyond their best, the lightest possible load makes a big difference. However, we have suffered quite a few failures of the newer SMD LEDs like these:
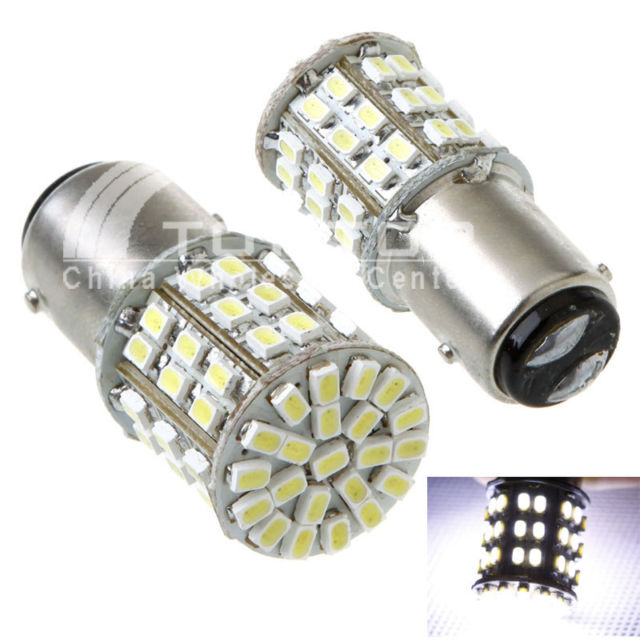
However, the older style while more robust have a lower light output.
The Indicator bulb relay relies upon a big current draw to heat up the bimetal element inside the flasher to light the Indicator Bulbs. If you want to use LEDs in the Indicators then use an Electronic relay to replace the standard Citroen item. Remember that LEDS are Polarity sensitive, so the van wiring Earth must be to the 'case' of the bulb and the positive to the bottom Centre contact on the bulb.
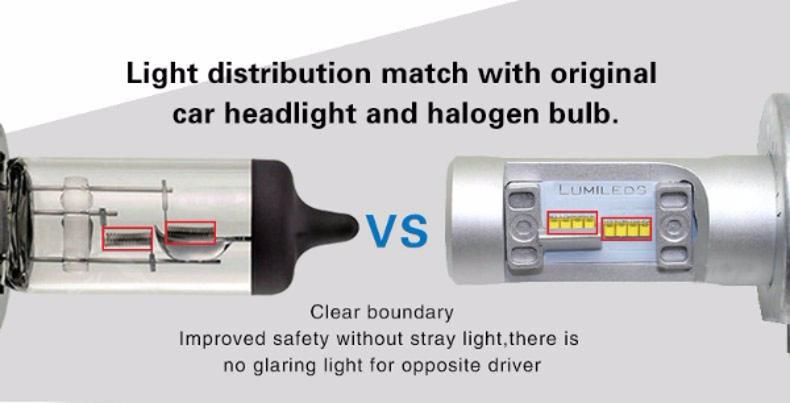
Head Light Bulbs.
Many LED bulbs sold as Headlight bulbs have not been suitable for UK roads, however we have now found Philips LED very high Brightness and low current (just 40watts per bulb) amps which are suitable H4 replacements, but an adapter will be required.
What you should be looking for is a Head Light Bulb that has the LED's in exactly the same place as an H4 eqiuvalent, see photo below
STARTER
The 6v Starter should be replaced with the smaller lighter 12v item. However the 6v starter will happily run at 12v but YOU MUST NOT RUN THE STARTER FOR MORE THAN 10 seconds at a time and rest it for 60seconds before trying again, otherwise you risk burning it out.
If you reuse the old 6v Starter Motor then the engine should be set up to fire up as quickly as possible after you turn the key. The usual cause of a lengthy start (assuming all the mechanicals are good and serviced correctly) is because the petrol has drained back to the fuel tank so the pump spends a long time drawing fuel all the way from the tank to the carburettor. The mechanical pump is effectively a non return valve, but over time the valving works less efficiently. Consider fitting a new fuel pump or non return valve near the carb, it can make a huge difference to the time it takes to start.
.
IGNITION COIL,
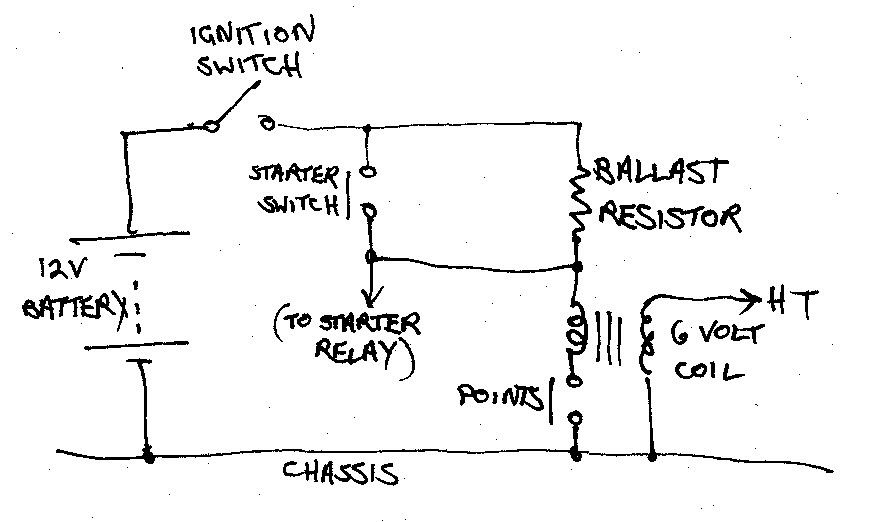
The ignitional coil can be swapped for a 12v version or you can retain the 6v coil and run it with a Ballast Resistor (BR). The BR is used to drop the voltage at the Coil from 12v to about 7-9v. Except when cranking the engine when 12v is applied to compensate for the voltage drop caused by the Starter Motor operating.
To wire in a BR you take a 12v ignition controlled feed to one side of the BR and then from the other side of the BR to the Coil in the normal way. then wire up from the ignition/Starter switch directly to the Coil to provide 12v, only while the starter is cranking.
Our suggestion is to switch to a 12v coil with higher power output, sometimes called a 'Sports' Coil.
12v Alternator
We now have a replacement 12v, high Power Alternator that is a bolt on fit for vans post 1962. It has a quality built in electronic regulator so does not require the unreliable £29 Black Box Regulator that sits behind and above the Gearbox which is the cause of so many charging related issues. It comes with instructions on how to bypass the Black Box. This version is perfect for running 12v Fridge Freezers and charging the 12v batteries used for running the Interior Spot lights, Cooker Ignition, Invertor, etc in Catering conversions while driving.
While it is not cheap at £139 it is a quality 70A item complete with the correct pulley using all the existing brackets/belt and still half the cost of the low power original where the Black Box must be retained. Replacement of the Black Box can cost £29, a standard 30A Paris Rhone or Ducellier Alternator (usually Rebuilt items as new versions are no longer made) at about £170.
Switching to our replacement not only gives more than double the output but saves around £130 with the benefit of better long term reliability.
We now have a similar new 12v Alternator setup as a bolt on replacement for a 6v Dynamo, complete with mounting brackets and the correct pulley, etc.
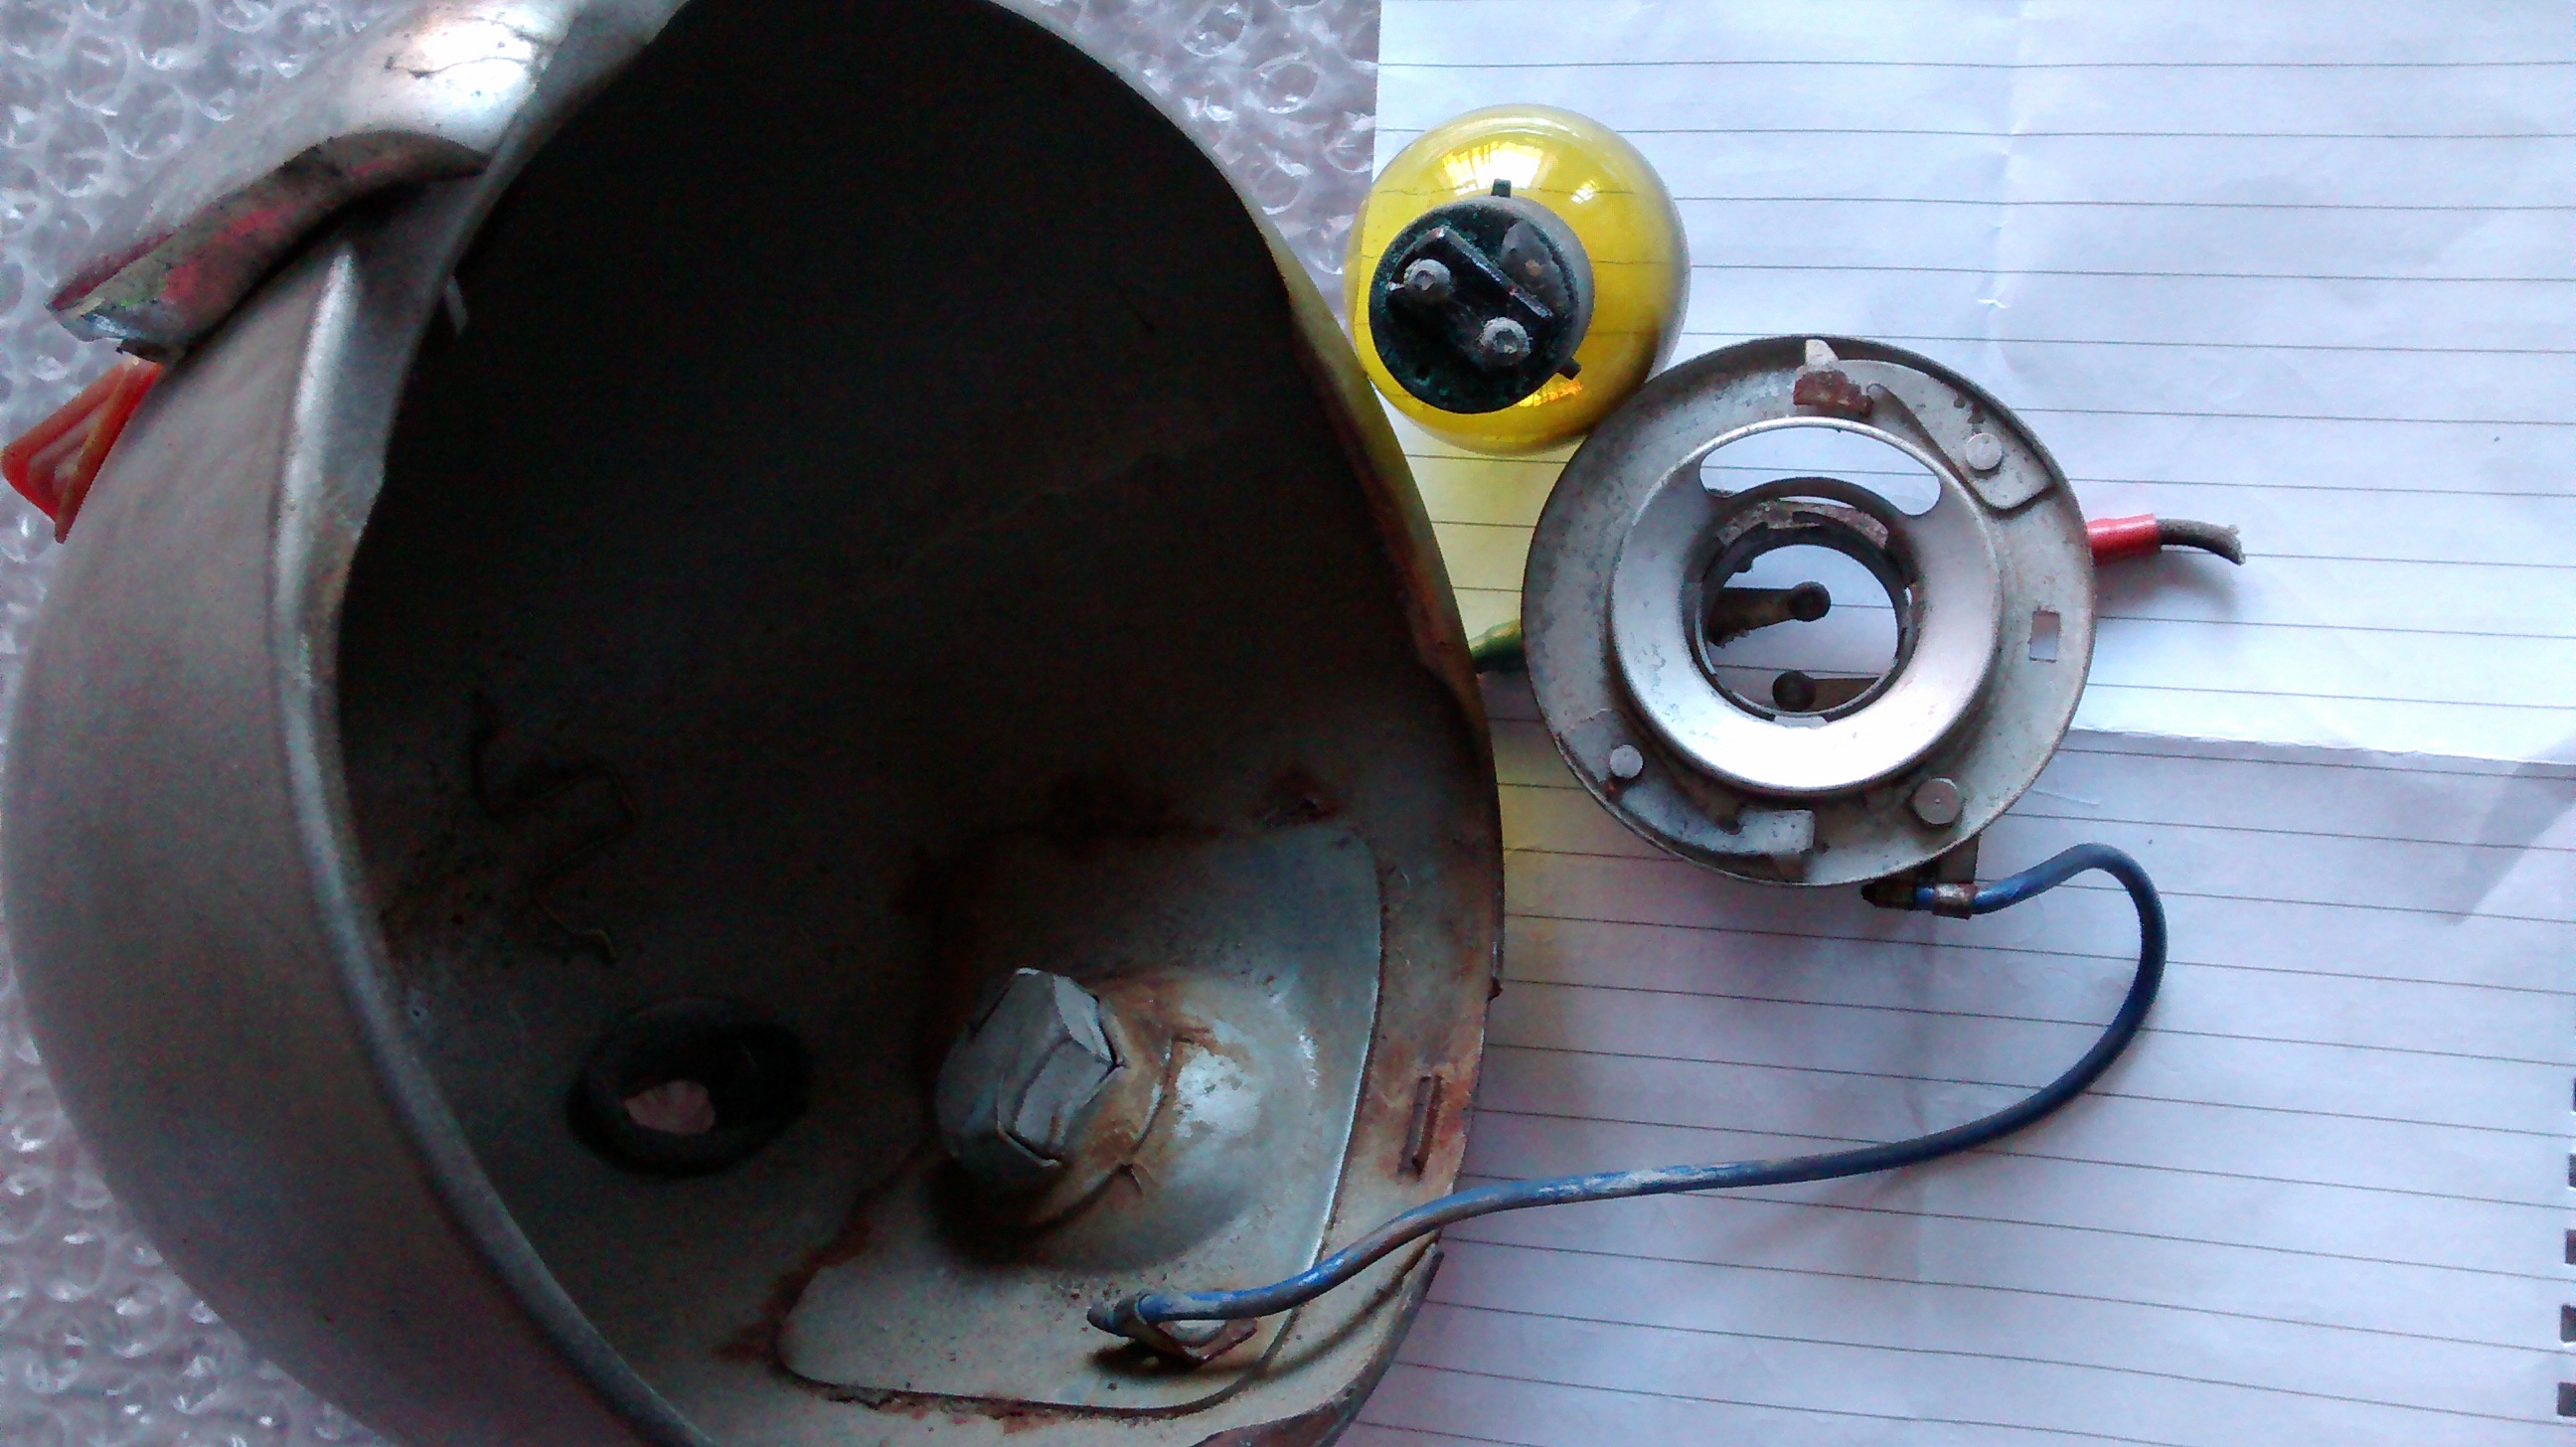
Cable Corrosion
Watch out for a problem with the Headlight Connectors as corrosion takes place between the input wire on the plug and the point where the rivet clamps that and the output Spade wire.
They corrode under the rivet where it is not visible. Suggest you always replace the Headlight bulb plug with a modern version.
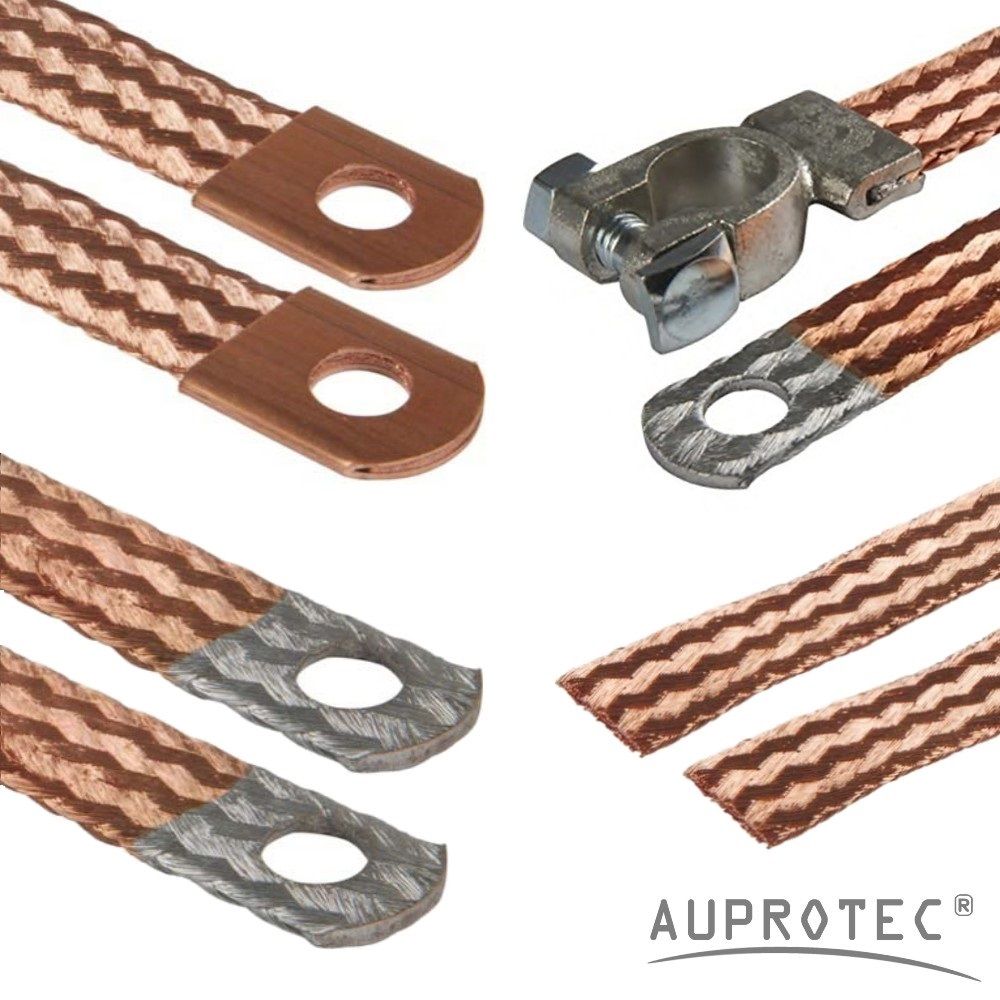
Earth Cables Citroen and Fiat
Also look for old Earth cable issues. In this photo below while the cable looks ok, corrosion has taken place between the Copper Braid and where the Steel eyelet connector crimps onto the Copper.
Over time Water gets into the joint, leading to electrolytic action, and the Copper/Crimp connection breaks down.
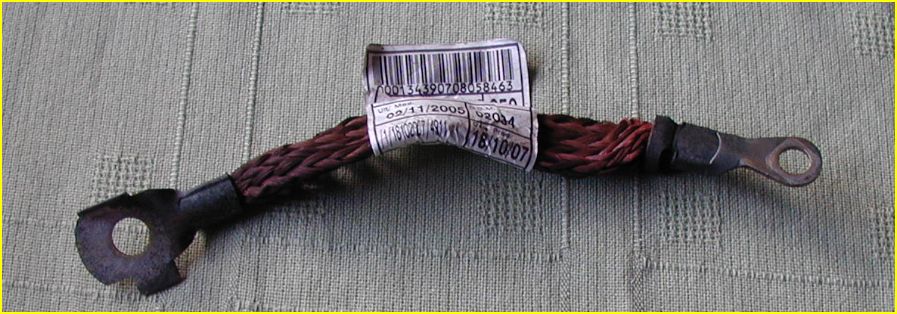
Any cable that is made up of Copper with Steel clamped on/Crimp connectors, like this Fiat one above, will have the same issues over time. If Road Salt water can get between the copper and the crimp connector there will be corrosion inside the connection where it is not visible.
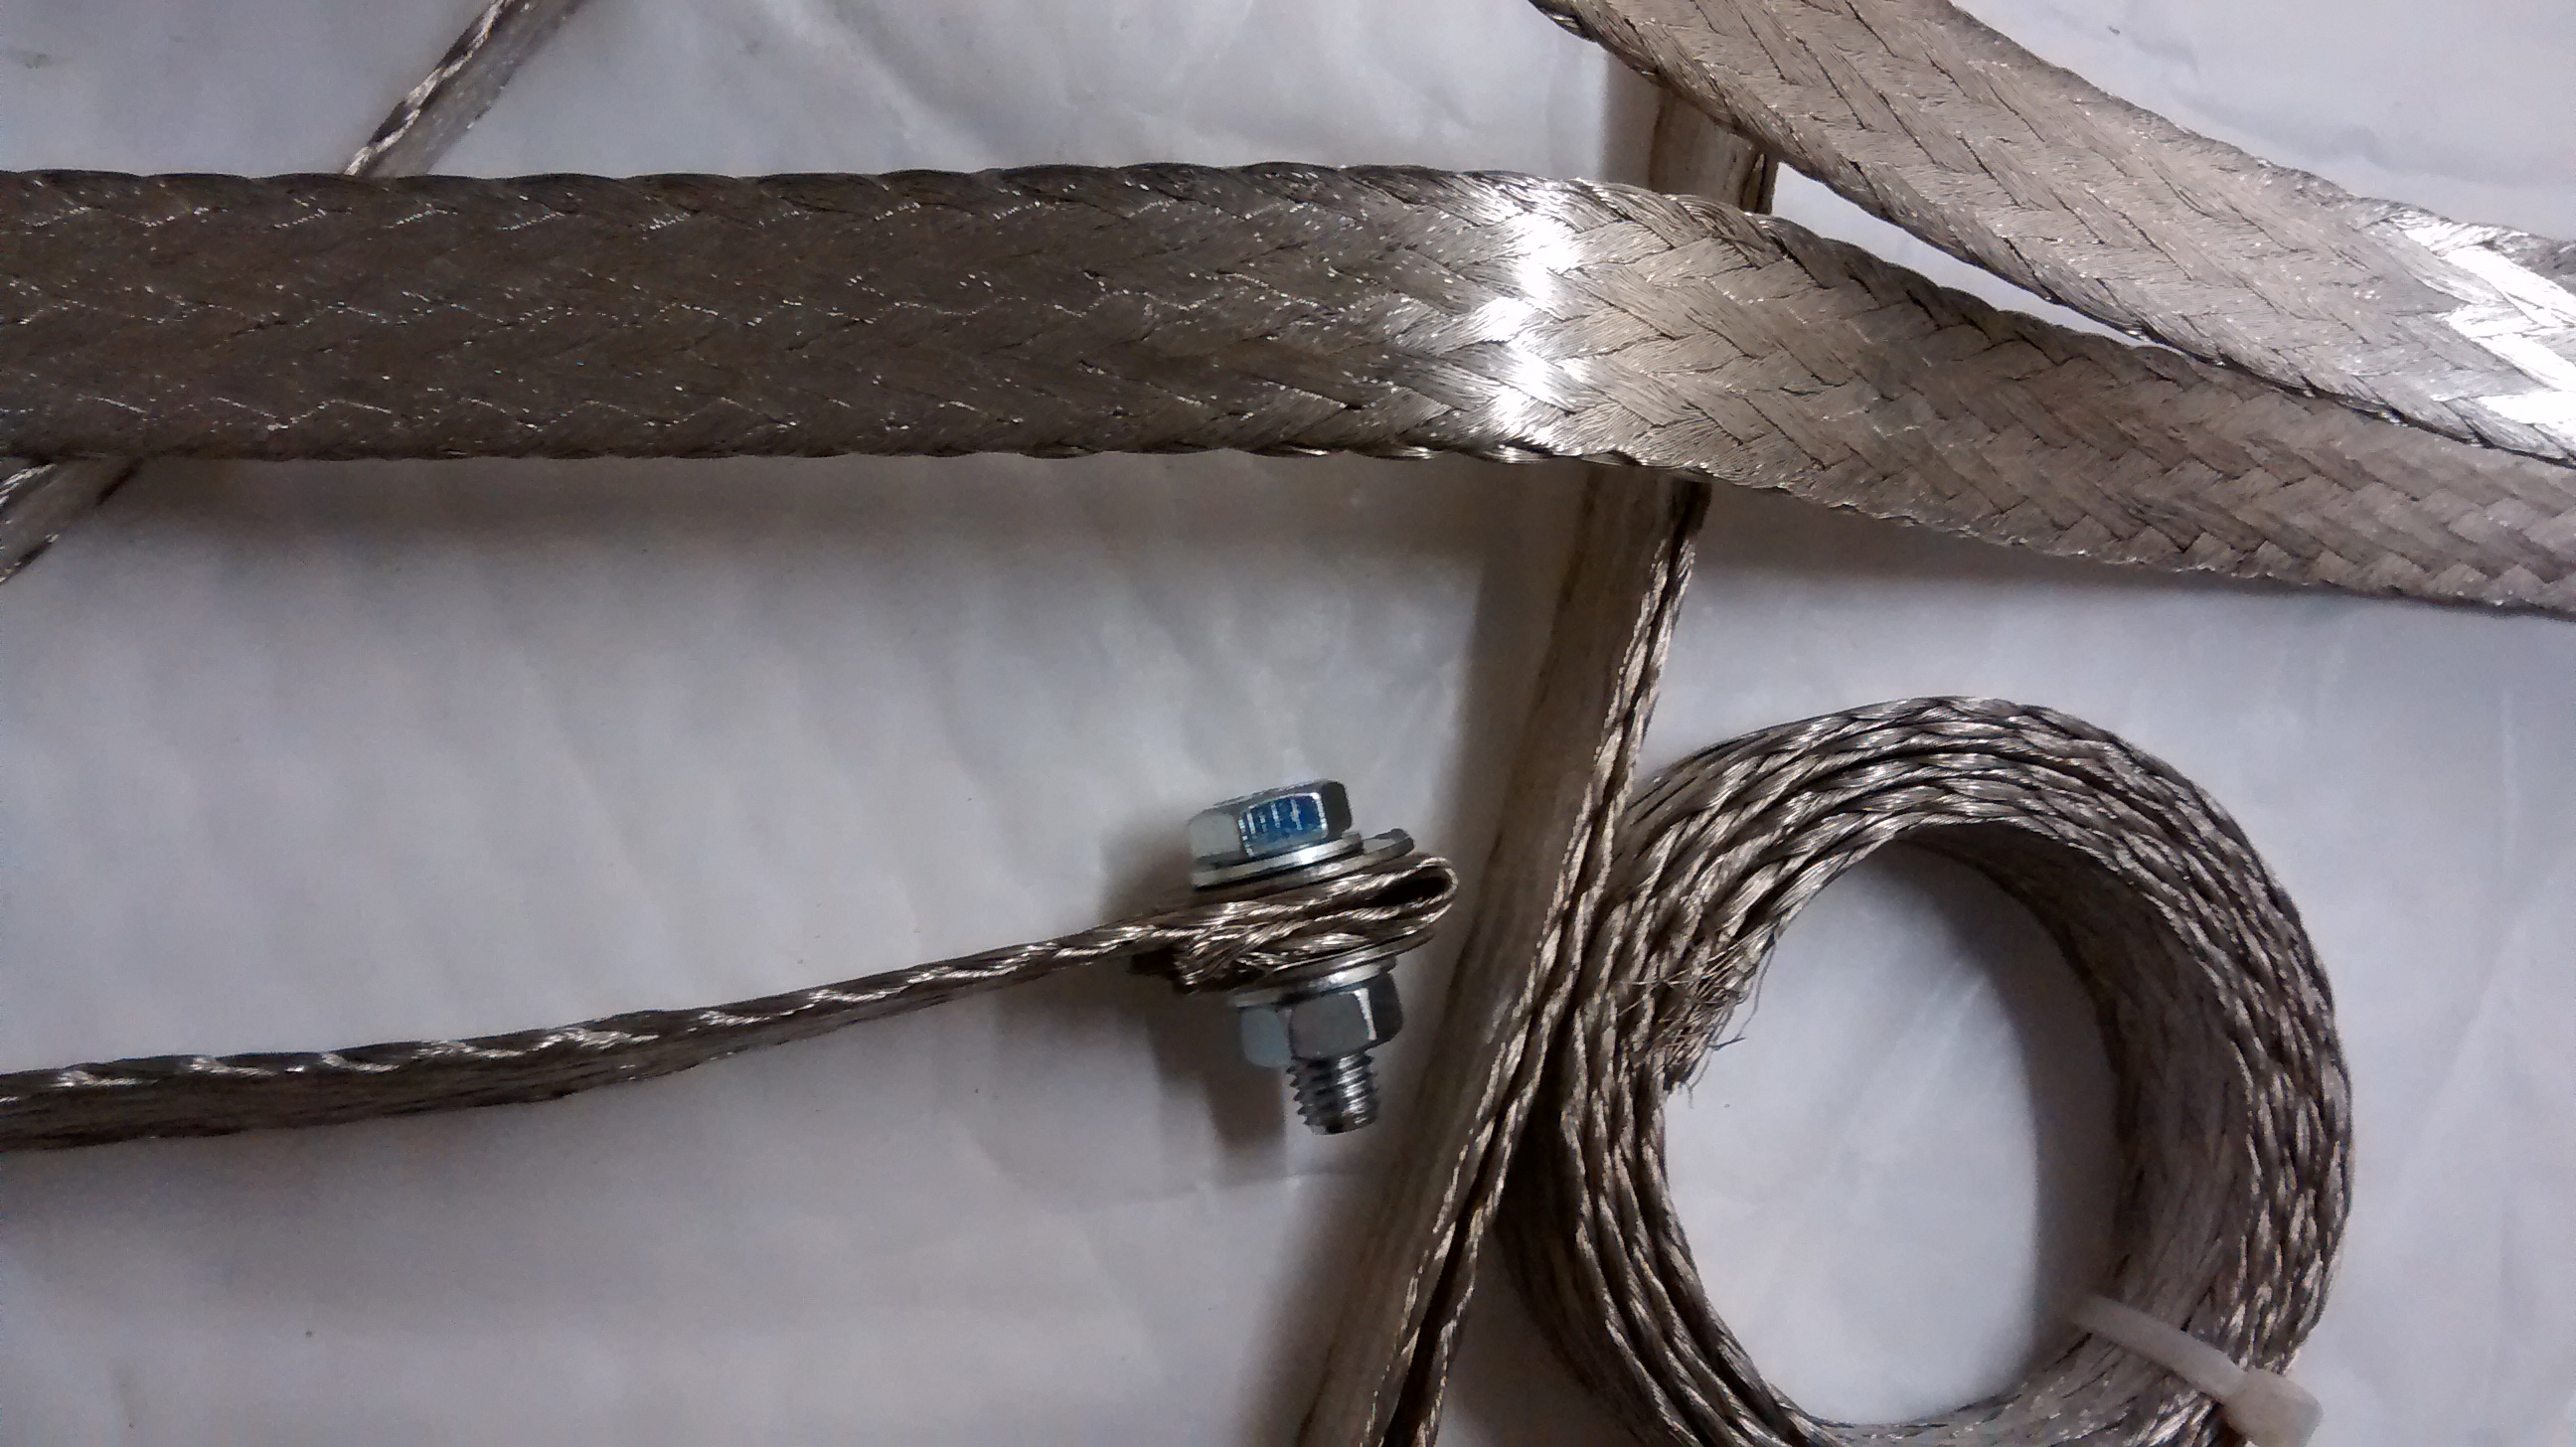
We suggest the solution is a braided cable that does not have Steel Crimp connectors, just holes where a washer and bolt clamp it to the body/Gearbox point. Something like :

A good size is about 25mm wide and 4mm thick (continuous 205amp rating). The length will depend on where you plan on fitting it.
To replace a Fiat X250 standard lead you will need a length about 250mm long. Probably about 700mm for a secondary earth strap?
There used to be a supplier on ebay that sold 25mm x 2mm at 300mm lengths but they are no longer operating.
This company sell Tinned Copper Braid in 1,000mm lengths at about £13, www.copperbraid.co.uk
see : https://www.copperbraid.co.uk/product/copper-braids/?Type=CopperFlatTinned&CS=35
The braiding can usually be parted easily enough with a screw driver to create a hole big enough to accept a 10mm bolt and washer. Try not to Drill/Cut it, but part the braids if you can as that will be stronger.
If you fold over the Braid ends to give about a 30mm double layer and put the bolt/washer through both layers it should be quite secure and resistant to fraying. Obviously soldering the end will be better still.
Suggest any hole is at least 15mm from the end of the Braid.
Even better, double layer the whole cable, say 20mm x 3mm doubled, so you have twice the current rating and even stronger connection points. Allow plenty of play for engine movement which can be significant as the vehicle ages/higher mileages.
Below is a cable made up in advance ready to fit. It is easier to build/assemble it off the vehicle.
Bend over the end for strength and then push through the Chassis/Gearbox bolt with the washers either side and a 'dummy' nut to clamp/compress it all together.
Then just remove the nut and it's washer and fit onto the vehicle. The Braid holds the Bolt tight in place so it is actually less fiddly to fit than the standard cable.
Don't overtighten the Bolts into the gearbox, 10mm bolts in Soft Aluminium will only need a few lbs of Torque.
Obviously important that the Braided cable is clamped with a washer (about 25mm across?) to spread the mechanical and electrical load.
There may still be corrosion at the contact points where the bolts go through because the cable sits where it catches all the road spray. However removing the bolts every few years and cleaning them should keep the current flowing. At least any corrosion will be visible and easily cleaned off.
Most likely only the clamping Washers will be affected by corrosion, the Braided cable should last indefinitely.
Better still, especially if you want a Garage to fit one, is to fit a completely new cable at the top of the engine out of the road spray.
If the cable has corroded, then it's possible the fastenings have corroded as well. If you ask a Garage to replace an Earth strap and bolts/nuts become sheered or threads stripped a 5 minute job could turn into an expensive one.
If the Garage leaves the original Earth Strap undisturbed and just fits a new strap there shouldn't be any surprises on the bill. It is only a 10 minute job, literally.
We replaced an Earth strap between Gearbox and Chassis in December 2015 and it took 10 minutes. With the 'joint' now being more open it should dry out more readily and the Tinned coating should also extend it's useful life. We would guess at least 8 year useful life. When the cable does begin to suffer, it all comes apart very easily for inspection, cleaning, refitting and another 8 years life.
Fiat X250 supplementry Earth Strap.
For an example of a secondary top engine bay Earth Strap, this is a suggested DIY approach that we did as an example in February 2015 on a Fiat X250 Auto :
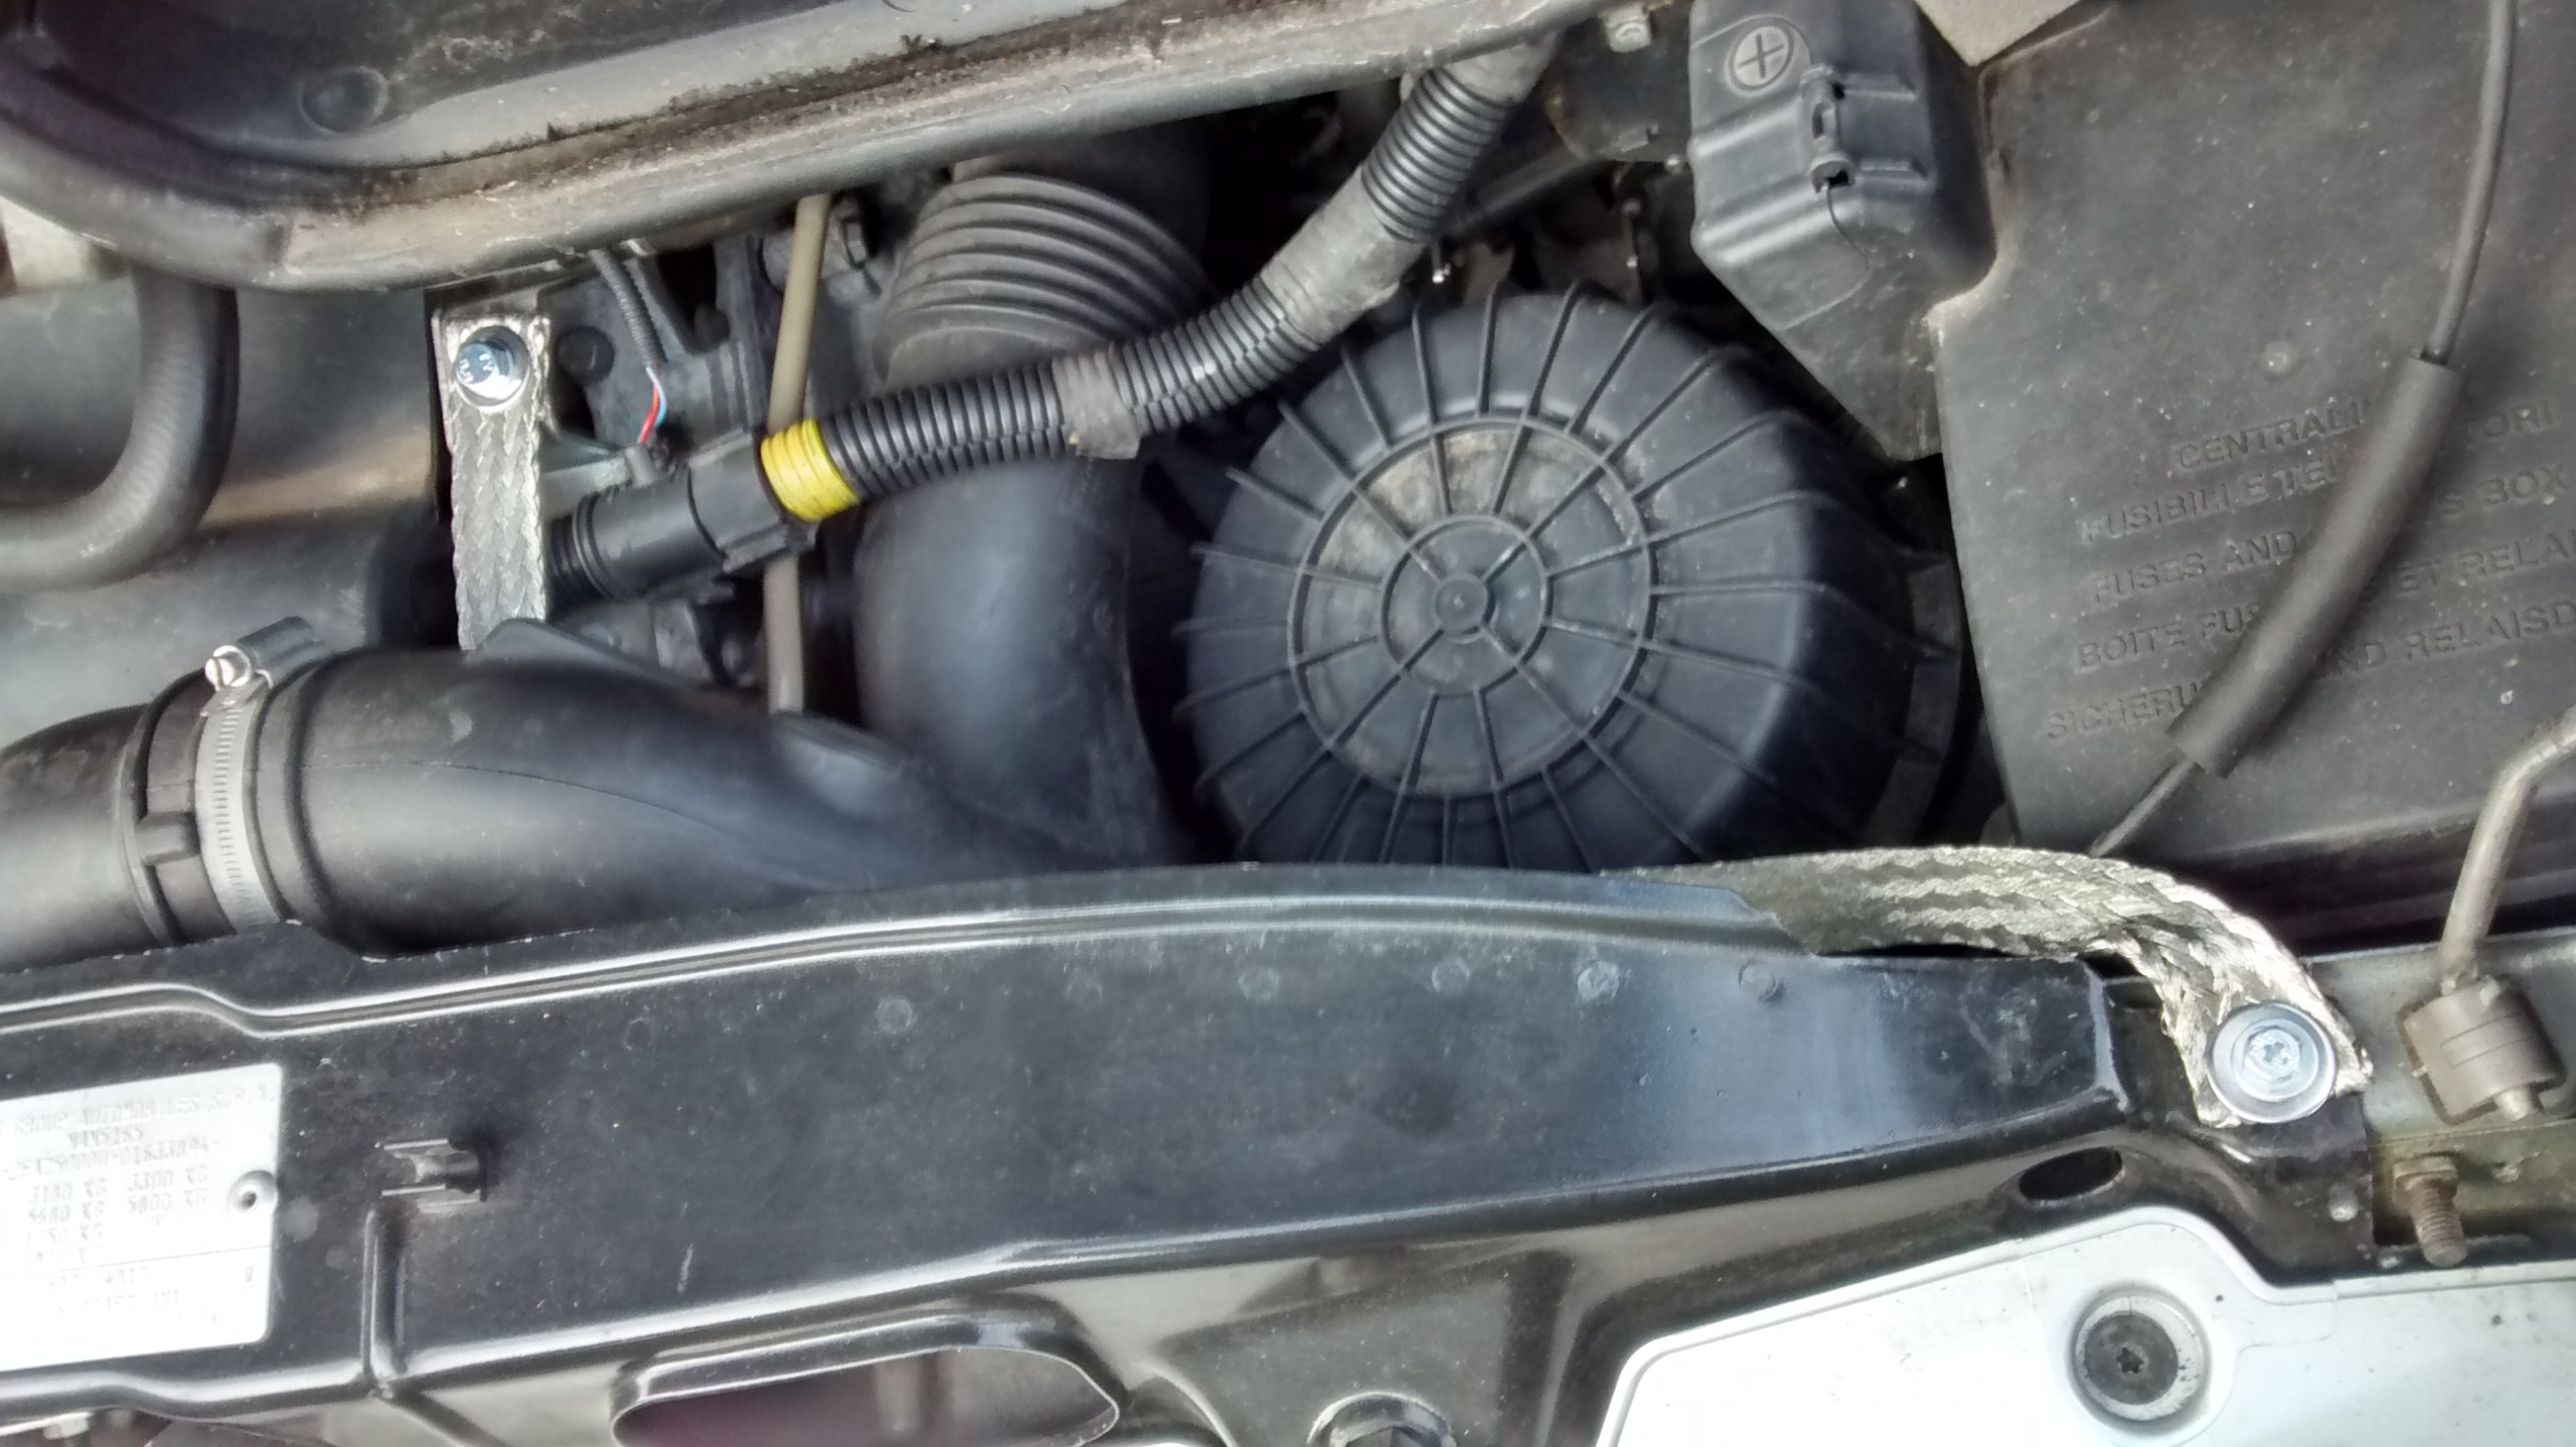
You will note that Earth point on top of the engine is to a Water tube mount with a predrilled hole that is usually free. This Water tube mounts to the engine at over four separate points so there should always be good contact. The other end is wired to the front crossmember, see it over on the right hand side of the photo.
While we do not suggest this is how a Garage should fit one of these upper earth straps, this is a suggested approach for easy DIY. It might not be the prettiest but is functional, quick and easy.
Suggest it is a very good idea to use grease on the bolt threads.
This company below sell ready made Copper Braid in 250mm lengths with M10 holes each end of the Tinned Braid at around £6 plus shipping to replace an X250 original lead. You will need washers under the Bolt head.
Or this company, Auprotec, can supply soldered end, Copper Crimp, etc made to order Earth Leads if you don't want to make your own. Note this is an example link only as the item seems to be undersized.
Don't buy the £20 item in the link, use it to contact the company for a quote.